System File Checker (SFC) is a handy tool built into Windows operating systems to help users scan and repair corrupted or missing system files. In this guide, we’ll walk you through the step-by-step process of running an SFC scan using Terminal.
(Terminal is a new, more advanced version of PowerShell. Previous to that was the old Command Prompt). Command Prompt & PowerShell are still available to use in Windows 11 by typing either cmd or powershell in the Start Search.
Quick Method – Run SFC Scan In Windows 11
- Open Windows Terminal (Admin)
Right-click on the Start Menu flag and select Windows Terminal (Admin) from menu.
- Run SFC Scan
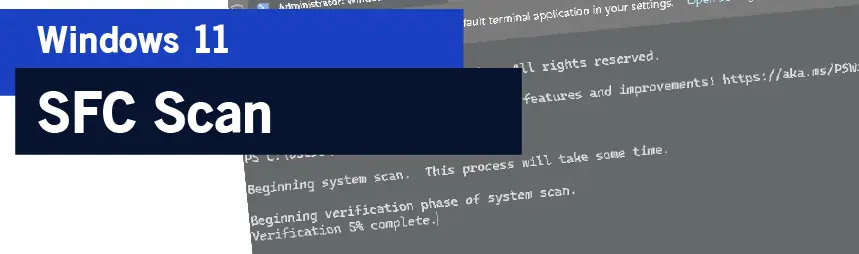
Type & Enter the following text: (there is a space after sfc but no space between /scannow
sfc /scannow - Allow To Comlete & Reboot
Once it completes. Close Windows Terminal & restart your computer.

Detailed Method With Explanation
Step 1: Open Terminal Firstly
You need to open the Terminal application. You can do this by pressing the Windows key on your keyboard, typing “Terminal” into the search bar, and selecting the Terminal app from the search results. Alternatively, you can use the keyboard shortcut “Win + X” and choose “Windows Terminal (Admin)” from the menu.
Note: Always launch Windows Terminal as Admin.
Step 2: Launch Command Prompt in Terminal
Once the Terminal is open, you’ll need to launch the Command Prompt. To do this, type “cmd” into the Terminal window and press Enter. This will open a Command Prompt session within the Terminal.
Step 3: Run SFC Scan
In the Command Prompt session within Terminal, type the following command and press Enter:
sfc /scannowThis command instructs the System File Checker to scan the integrity of all protected system files and repair files with problems when possible. The scan may take some time to complete, depending on your system’s performance and the number of files it needs to check.
Step 4: Wait for the Scan to Complete
Once you’ve entered the command, the SFC scan will begin. You’ll see a progress indicator that shows the percentage of completion. It’s essential to let the scan finish without interruption.
Step 5: Review Scan Results
After the scan is complete, you’ll receive a message indicating whether any integrity violations were found and repaired. If the SFC scan successfully repaired the system files, you’ll see a message stating, “Windows Resource Protection found corrupt files and successfully repaired them.”
Step 6: Reboot Your System
Once the SFC scan is complete, it’s a good idea to reboot your system. This ensures that any changes made during the scan take effect and that your system operates smoothly.
Additional Information About SFC Scans
Running an SFC scan via Terminal on Windows 11 is a straightforward process that can help resolve issues related to corrupted or missing system files. By following the steps outlined in this guide, you can effectively diagnose and repair common system file problems on your Windows 11 computer or laptop. Remember to perform regular system maintenance, including SFC scans, to keep your system running smoothly and efficiently.
How Analyze the Log File That SFC Generates in Windows
When SFC Scan runs, it generates a detailed log report within a text file. Advanced users may want to view this log report when troubleshooting a particular issue. The log files are called CBS Files (CBS stands for Component-Based Servicing).
The latest CBS log report can be located by opening Run (right-click Start Menu flag and select Run) and paste in the following address:
%windir%\Logs\CBSThe log file (CBS report) can be opened with Notepad. Specific items can be found within Notepad by selecting Edit / Find
End.